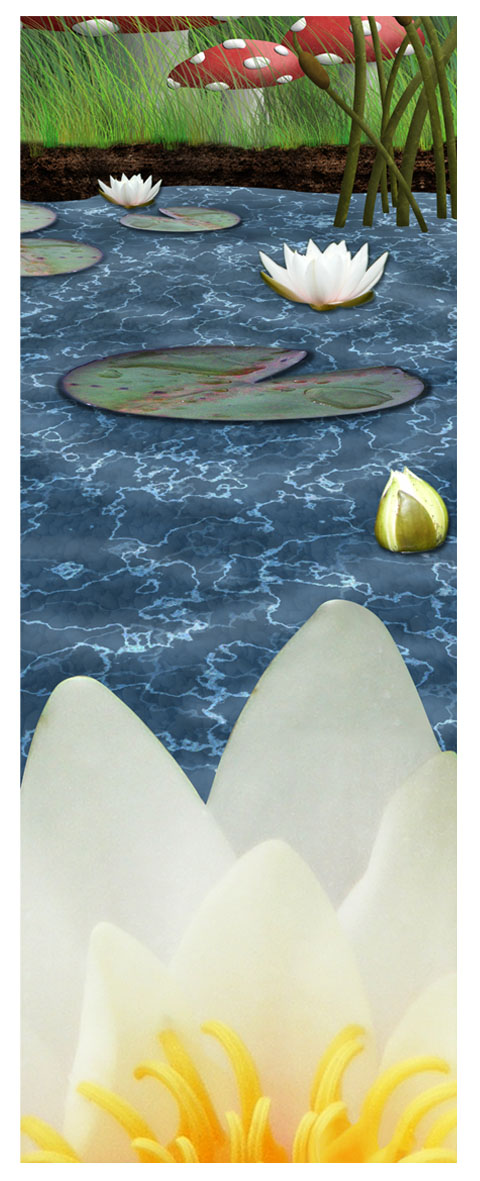
Reeds

To make the water reeds, I am using the technique I used previously to create the seaweed in the Little Mermaid. This involves using the brush tool and some textures to create depth and shape.
Flower

I have been planning to create a fully digitally painted flower for the foreground. This begins with creating paths to the shape of each petal, selecting that shape and swatching a variety of colours from the original. These colours then merge together in the new version to create shadows and highlights in a cleaner version of the image. However, I have realised that to get this to the high standard that it needs to be, it will take a lot of time, and time is becoming an issue in this project. So I have chosen a different route to improving the original image.

An important part of the flower that needs cleaning up is the petal tip that can be seen in the lower right corner. It is important that I remove this because it ruins the illusion I am trying to make that the viewer is standing in the centre of the flower. Therefore, I have used the Clone tool to paint over this defect. I have then increased the brightness and sharpness to create a glowing effect due to the brightness of the white.
Ripples

I have realised that the water reeds could sit better within the scene with the addition of ripples to the bottom of the stalks. I have done this with Filters>Distort>Twirl to create a vortex. I then altered the perspective and experimented with effects and the eraser until they looked appropriate. I like the final outcome of this experimentation; however, they are quite small and will likely get lost in the piece as a whole.
 |
| Complete with Ripples |

Other Flowers
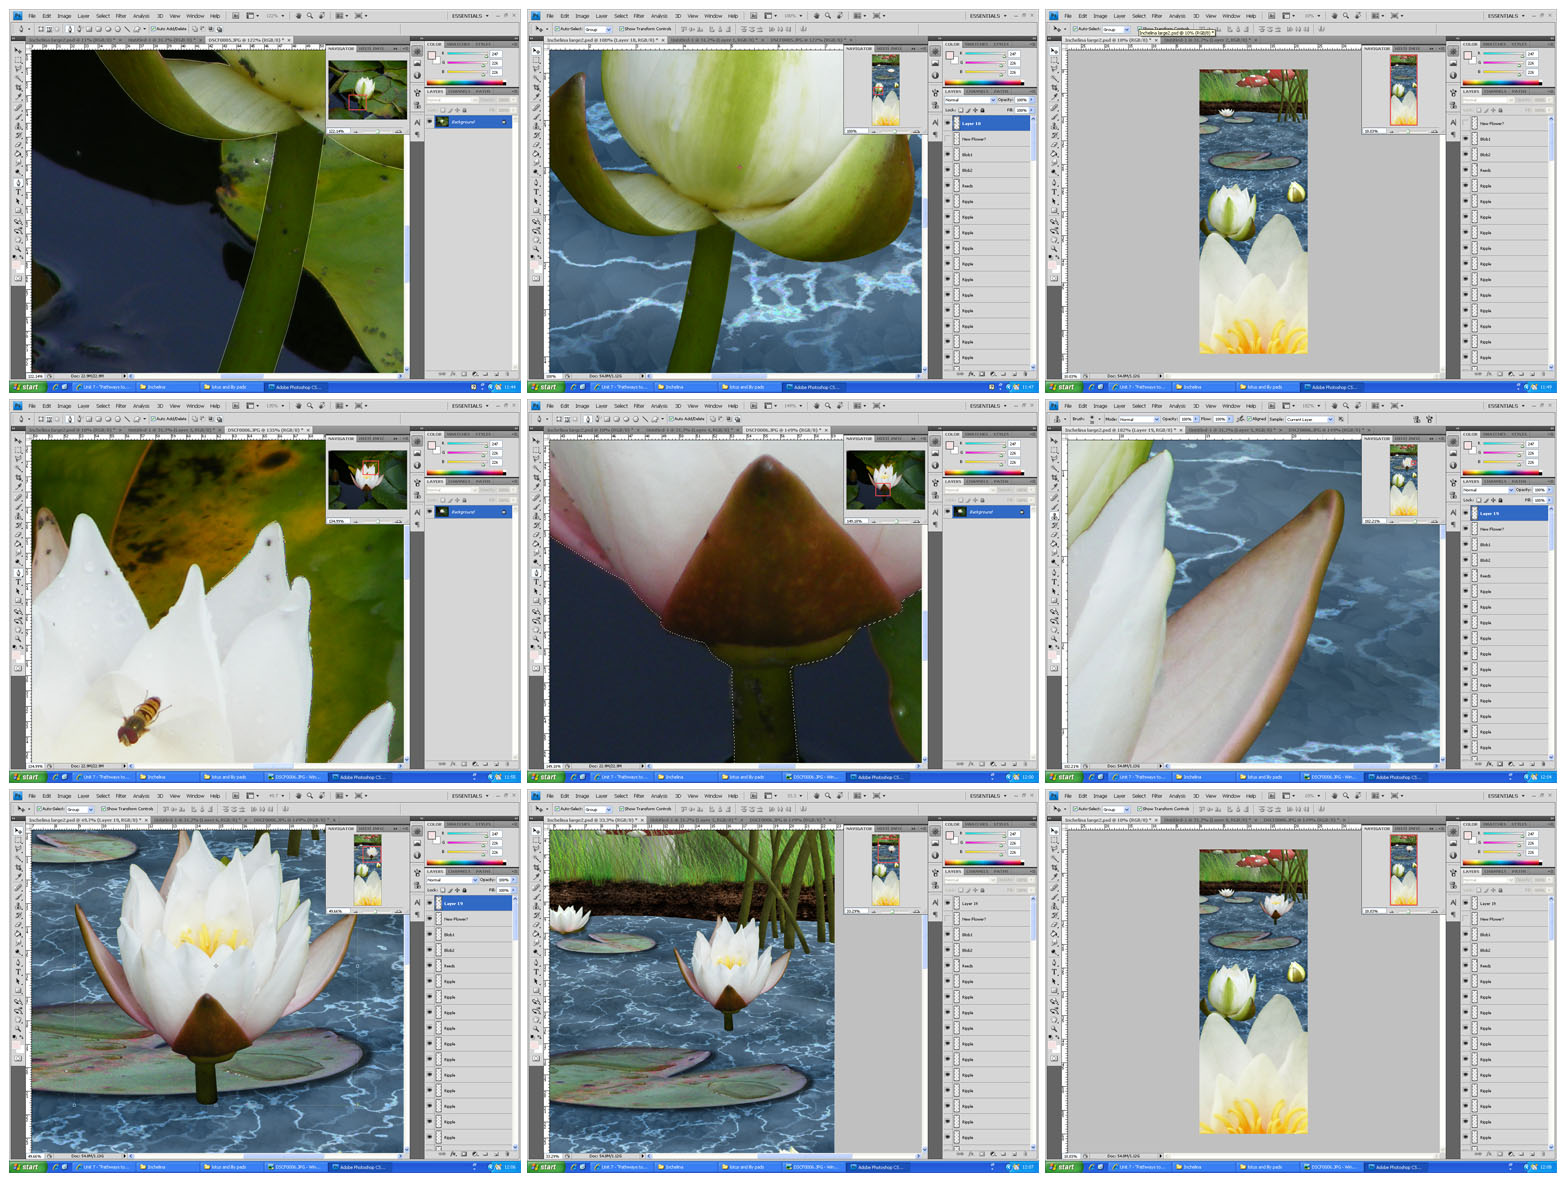
Lily Pads

I am pleased with how this image is developing. The illusion of perspective is improving, as is the sense of realism.
Bed

As I have been unable to gain access to a whole walnut shell, I have used a photo from my earlier research that demonstrates the exact idea I was hoping to create. Obviously I can't just use this image, so I have applied my digital painting skills to recreating my own version. Using the Pen tool, I created a linear version of the photo and altered the shape to suite perspective and surrounding objects. I have been able to create the effect of wood using some simple filters. I began with the intent of creating the grooves seen on the outside of walnut shells; however, this proved difficult and unrealistic.
So I changed tack and began using shades of grey to create a fully shadows version. I then layer this below the wood layer and altered various sections to suite lighting and add more appropriate textures.

 |
| Complete Walnut Bed |
Rose Petal

Pillow

As this is a bed, I have added a pillow underneath the petal-sheet. I think this confirms the idea that it is a bed.
As each of the elements is in place, I now need to work on shadows and highlights to help place the objects within the scene and around each other.
No comments:
Post a Comment